Before we dive into the “how-to” portion of this month’s series on Creating a Kitchen Pharmacy let’s take a look at a few best practice guidelines that everyone should implement when preparing herbal remedies at home.
I first want to encourage you today by saying, if you’ve been cooking homemade meals for any length of time — years, months, or even days — you already possess the skills necessary for making herbal remedies. Anyone can do it! Yes, that means even you 🙂
And just as any good cook will tell you…there are always secrets to success.
So let’s discuss a few of those that I have learned along the way, and a few that I want to be a bit more intentional with:
1. Start an Herbal Journal. In days gone by, many families possessed herbal recipe journals. These journals doubled as homemaking survival guides during a time when homemakers knew how to depend on the natural world by finding medicine among the plants, roots, and trees. In general, they didn’t have the luxury of running to the local drug store for a tube of antibiotic ointment. Neither did they have access to modern day pharmaceuticals.
Their recipes, often hand-written, were naturally passed on from mother to daughter from generation to generation. Based upon basic plant-based materials and herbal wisdom, the household recipes of days-gone-by mostly relied on ingredients found in everyone’s kitchen pantry, field, or garden.
We are reviving this tradition and I am slowly creating and adding to an herbal recipe journal that I hope will one day be a blessing to my children and their children.
Our family herbal recipe journal is a way for me to keep myself organized. It’s not perfect — in fact there are several scribbles, additions, and lines drawn everywhere but it allows me to keep a record of the different ingredients used in all of my remedies, dates (i.e. length of tincture time, etc.), and modes of preparation.
Start your own family herbal journal today!
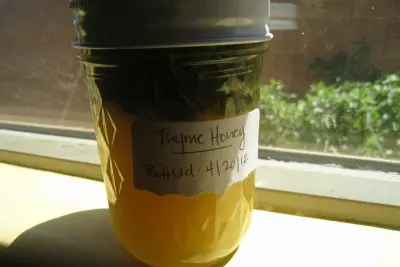
2. Label, label, label. Oh I am so bad about this! I am getting much better now, but still there are those times when I create what I think will be the cure for __________ and I think to myself “There’s no way I’ll ever forget what’s in here.” Well you’ve probably guessed it…I’d always forget and then I was forced to waste it.
Learn now to label all of your preparations by including:
- the name you have given the remedy
- the ingredients the remedy contains
- dosing or how to use instructions
- the date the remedy was prepared
You can either make your own labels with re-purposed paper, or you can purchase them here and print them off of your computer’s printer.
3. Go big or go home. That saying doesn’t really apply here and your experimental batches of this or that should be made only in small quantities. This practice alone works to dramatically reduce waste.
4. Use high-quality medicinal herbs. Ideally, growing your own is the only way in which to be certain of the quality an herb possesses. However, as we discussed yesterday, when purchasing medicinal herbs it is vital that you look for companies that have a reputation for honest, sustainable, and ethical practices. These companies should sell herbs that are organic and if they are wild-crafted, they should be harvested with respect for the environment.
Fresh is best, however properly dried herbs contain just as many medicinal properties. But how can you tell if the plant material you want to purchase is of good quality?
It should hold it’s color, smell, taste, and efficacy.
The color of dried herbs should be very similar to that of the fresh herb. Their smell should be strong, rich, and vibrant. They must taste potent and fresh. And the have to work!
5. Check with your health care practitioner before using an herbal preparation, especially if you’re taking a prescription drug. Tell your practitioner about all of the medications that you are taking — including nonprescription medications, herbal supplements, and vitamins. This is a good practice because many herbal remedies can interact with other drugs.
What’s on your list? Please share with us your tips, tricks, and best practices for making herbal remedies in your home!


I have been considering something as far as labeling goes, but I havent tested it. I was considering painting either the tops of mason jar lids with chalkboard paint, or putting a chalkboard paint square on the side of the jar. Then, once the jar is full it could be labeled with chalk and when the contents emptied and the jar washed, it would have a new fresh chalkboard for the next item. I have no idea if this would survive the canning process. Its just something I thought of.
I love that idea Karon! Because you mentioned it…I wonder too if the chalkboard paint would survive?
I saw my grandmother do this… use a regular canning lid for the process then put a decorative lid on top to make it pretty.
I have been really enjoying your site. I think we share many of the same interests. I used to have quite an extensive garden planted with every medicinal perennial I could find in Ohio, Indiana or Kentucky. Now that we are planning a move to the desert in West Texas I’m going to have to learn a whole new group of herbs!
I’d like to feature your site in a blog post. Would that be ok?
Linda
aka Ratwife
We have a blog about our move to West Texas at http://theratracelosers.blogspot.com/
Hi Linda! I was in a very similar situation to yours. I was born and raised in Georgia and had a beautiful garden. We moved to the desert in Phoenix, Arizona nearly 7 years ago and needless to say, it required a huge adjustment in the way we grew things. But I’m here to say that it can be done 🙂 Not to mention, the medicinal plants abound here in the desert!
Many blessing to you and your family during this time of transition. And of course you may share Frugally Sustainable in a blog post…I’d be so honored by that!
If you can find circular labels you can print on them and stick them to the lid after they cool a little. We found that its not the best idea to use sticky labels on the jars. The stickum doesn’t come off easily!
Linda
Check out our blog http://theratracelosers.blogspot.com/
I enjoyed the tips you are providing on your frugal living can make life easier by providing long term living for doing something one time.Thanks for the the information……
What I’ve done for labeling isn’t nearly as sophisticated as chalkboard paint – I use masking tape and a Sharpie. I really like the chalkboard paint idea, though- I wonder if you use something along the lines of the old fashioned decanter tags with chain and cover it with CB paint. You would be able to change out the info, the tags, and there would be nothing to throw away.
Lol… me too! I keep a roll of bright lime green painters (masking) tape and both a fine and med. point Sharpie in my kitchen drawer. It is definitely not fancy but it’s cheap, readily available and I am more willing to use it “frivolously” than I would if I was using labels that I’d paid more dearly for. I love the “idea” of chalkboard paint, even pinned the idea on my ‘organizationally challenged’ Pinterest board, but in all honesty I doubt I’ll ever get around to it. Tape and Sharpie = easy, cheap and ready now!
For regular canning, my family has always used a china marker to write on our lids. Love the Kitchen Pharmacy posts so far and looking forward to more. Don’t think we’ll be able to do ours up this season, but there’s no time like the present to plan for next year. 😀
I’ve been thinking about a labeling procedure as well. This is helpful, thanks. New here, I’d love a follow back at http://sassyshopperreviews.blogspot.com/ when you can. 🙂 I’ll be popping by for more ideas soon!
I have a question about kombucha. Is it appropriate to ask you on this site?