
All-Natural.
Healing and Soothing.
Intense Skin Protection.
These are all words that come to mind when I think of a Gardener’s Salve.
Come spring…my priorities instantly shift to the care of my home and garden.
I love working outside — hands in the dirt!
But I’m not necessarily fond of the resulting rough, weathered, and chapped skin.
Qualities of a Good Gardener’s Salve
My Gardener’s Salve is made with oils and butters that protect, soothe, and heal the skin from hardworking wear-n-tear, minor wounds and scratches, and environmental elements (including sun, wind, and arid climates).
Likewise, beeswax — one of nature’s most potent ingredients — creates an excellent antibacterial, germ-killing product that is superior in it’s ability to protect the skin by locking in moisture.
Skin-loving botanicals such as comfrey root, calendula flowers, and plantain leaf work together to heal and mend the skin from superficial scratches, bug bites, and a variety of other irritants. Essential oils of lavender and rosemary are a perfect addition because of their antiseptic and anti-inflammatory properties. Lemongrass repels insects. And carrot seed oil is vital for tissue repair.
The Recipe
Ingredients
*Use organically-grown ingredients whenever possible
- 10 ounces oil blend (i.e. sweet almond, sesame, coconut and/or olive oils)
- 1 ounce herbal blend comfrey root, calendula, and plantain, dried
- 3 ounces butter blend (i.e. shea, cocoa, mango, and/or aloe vera butter)
- 1-2 ounces beeswax
- 1 ounce blend essential oils of rosemary, lavender, and lemongrass
- 0.2 ounces GMO-free vitamin E oil
Optional Add-Ins
-0.2 ounce Comfrey Extract
-1 ounce Aloe Leaf Extract
-15 drops carrot seed oil
Method
1. Weigh the dried herbs using a kitchen scale.
2. Prepare the oil infusion. You can do this one of three ways:
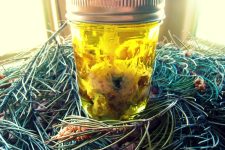
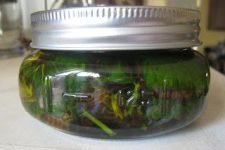
- Cold Infusion. In a glass mason jar, cover the weighed herbs with 10 ounces of oil. Stir to combine, and allow oil and herb mixture to steep for 4-6 weeks.
- Hot Oil Extract. In a glass mason jar, cover the herbs with 10 ounces of oil. Stir to combine. Place the glass jar in a pot on the stove, or in a crock pot, filled with a few inches of water on lowest setting (Be sure to put a towel on the bottom of the pot.). Infuse the oil and herbs for 4-8 hours, a day, or up to 3 days. Note: Watch the pot and add water as it evaporates.
- Alternatively. According to Rosemary Gladstar in her book Herbal Recipes for Vibrant Health: 175 Teas, Tonics, Oils, Salves, Tinctures, and Other Natural Remedies for the Entire Family you may also do it this way; “Place the herbs and the oil in a double boiler and bring to a low simmer. Slowly heat for 30 to 60 minutes, checking frequently to be sure the oil is not overheating.”
3. Strain the oil and herb infusion through a cheesecloth. Squeezing to extract as much oil as possible. Be sure you collect at least 8 ounces (1 cup) of herb infused oil.
4. Combine herb infused oil and butters in small pot or double boiler over low heat and melt, stirring frequently.
5. Over very low heat continue stirring and melt 1-2 ounces (depending on how hard you’d like your salve) of beeswax into the herb infused oil and butters. I suggest starting with the lesser amount of wax and adding more if needed. Note: To check if the mixture is the right consistency, because the salve hardens as it cools, Rosemary Gladstar again suggests placing a “tablespoon of the mixture in the freezer for just a minute or two. If it’s soft, add more beeswax; if too hard, add more oil.”
6. When the consistency is to your liking, add essential oils and extracts, if using. Stir well to combine and pour into tin or glass containers. Note: I get my salve containers here…
To use: Apply liberally before and after working in the yard, gardening, and/or household chores. Focus on the extremities…areas such as hands, fingertips, cuticles, elbows, knees, feet, and heels.
Where Can I Get This Stuff?
-Mountain Rose Herbs…they have everything you’ll need for this remedy! It’s your one-stop-shop!
–The Bulk Herb Store also carries many of these ingredients if you’d like to price check.
I do have this Gardener’s Salve
available for purchase in my Etsy Shop.
Click here to visit the Marketplace…
 A Recipe for Herbal Bedtime Tea: An All Natural Sleep Aid
This sounds like it would be absolutely divine after a long, hard weekend in the garden! Thanks for the recipe!
I love how your recipe has so much wiggle room. I have a lot of allergies so its amazing how many recipes I have to toss just because I am allergic to something in them. I can’t wait to try this.
Sounds wonderful. Are the main ingredients by weight or liquid volume?
Love this been making for years with pepermint
This was really useful, Thank you!
Do you really use a whole ounce of essential oils in this? They’re so potent, it seems like quite a bit for this size recipe.
Thank you for the directions. Can you tell me the purpose or benefit of using a towel on the bottom of the pan?
Thanks
I work in laboratory and wash my hands constantly all day long. Does this leave a greasy feeling to your hands. I need something that will soak in and heal my hands. I have to a new pair of gloves on at least 100 times a day it seems like.